How to Make Fondant Pumpkins
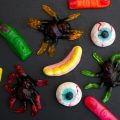
In a few days it’s already Halloween! It’s a super fun party for children and for the grown-ups, too! It’s one of those celebrations where you can just take advantage of your imagination when preparing the costume, the decorations, and even the food! There are just so many options and ideas for Halloween food, that it’s crazy!
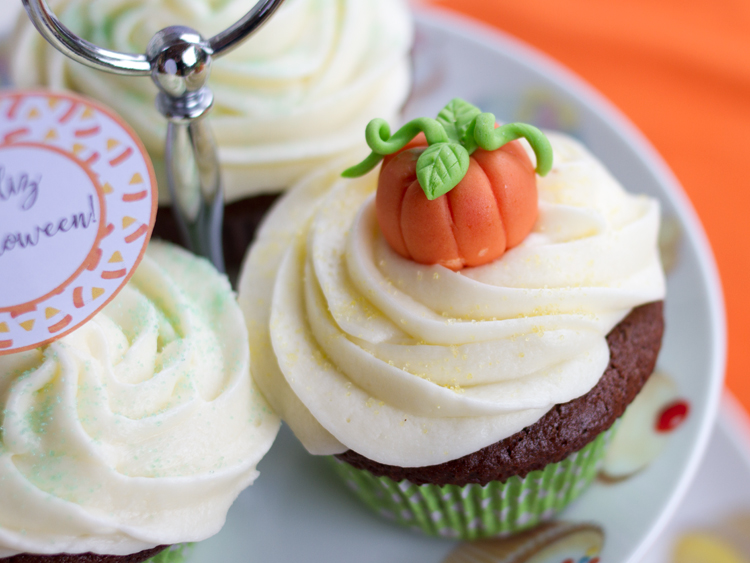
One of the things that I love preparing for parties are cupcakes. They are very versatile, we can make them in a large variety of flavors, and we can easily adapt them to the theme of our party. In this case, for Halloween, there are thousands and thousands of decoration options. Here is the recipe for chocolate cupcakes that I used and love.
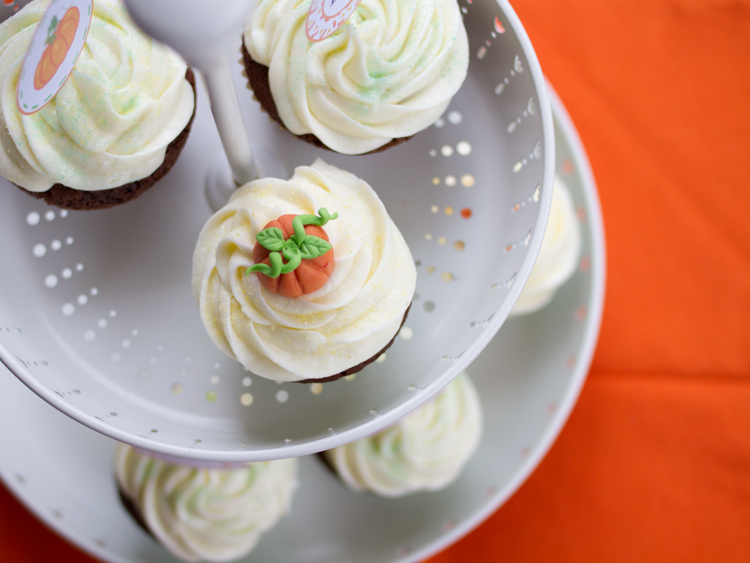
Today I am going to teach you how to make some simple fondant pumpkins, which you can place on top of your cupcakes, and they look so cute! They don’t take much time to make, they are low-cost and we really don’t need many materials to make them. However, they will give our cupcakes a special touch, which will bring a lot of sophistication to our party. I also added a little bit of colored sugar to give them a little sparkle.
We can make them in whatever color we want, it doesn’t have to be orange, although this is the typical color for Halloween. In addition, if we wanted, we could also use them for any fall or Thanksgiving decoration or celebration.
What you need:
- Orange and green fondant (although you can use whatever colors you like)
- A small paintbrush
- Water
- Fondant modeling tools (if you don’t have them, read below what other tools you can use that you might already have at home)
Process:
TIPS FOR MODELING FONDANT:
- In case you don’t know, fondant dries very quickly. Therefore, don’t forget to wrap it well with a plastic wrap, and put it in a ziplock bag when you are not using or handling it.
- Water acts as glue on the fondant. Be careful, don’t use too much, as it leaves shiny spots on the fondant. It’s convenient to apply it with a small paintbrush and only where necessary to glue it, in a place where it won’t be seen.
- Once you have made your pumpkins, wrap them individually (very carefully) in plastic wrap, and then store them in an airtight container so they last longer. Try not to stack them inside the container, and if possible place them in a way that they don’t touch each other. Store them at room temperature and away from direct sunlight.
- In theory, fondant figurines can last up to 2 months in an airtight container. However, I don’t like to leave them for so long, because they harden. For me, the ideal moment is to prepare them during the week of the event, so that you have enough time to make them, but they don’t have time to harden too much.
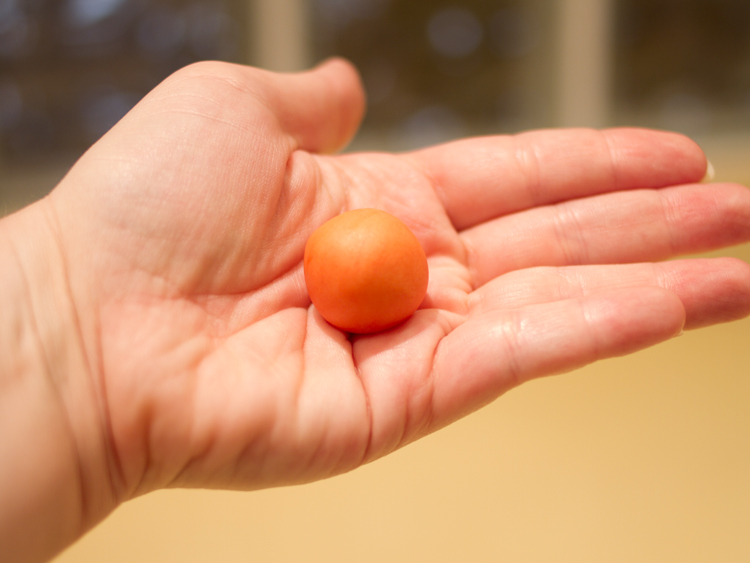
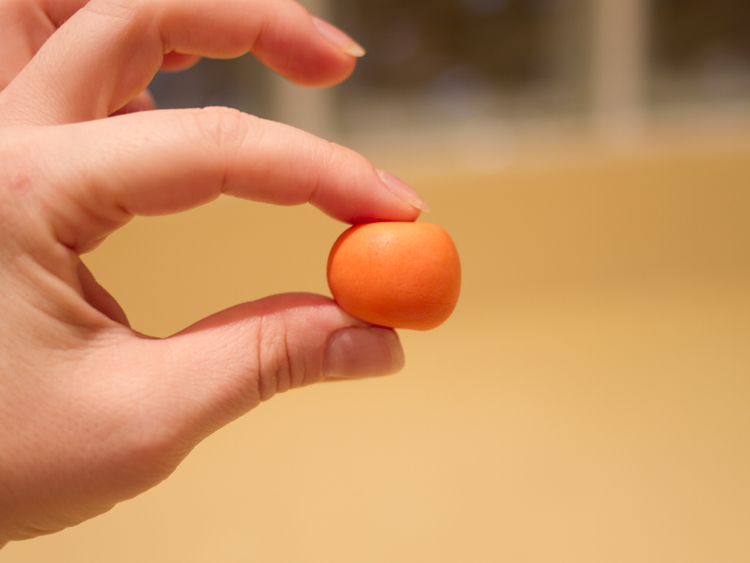
Well, now that we have the basic information, let’s move on to the process. To prepare our pumpkins, the first thing we will do is take a small piece of fondant and give it a rounded shape. We will leave it very smooth and squeeze it a little bit by two opposite ends, to give it more of a pumpkin shape.
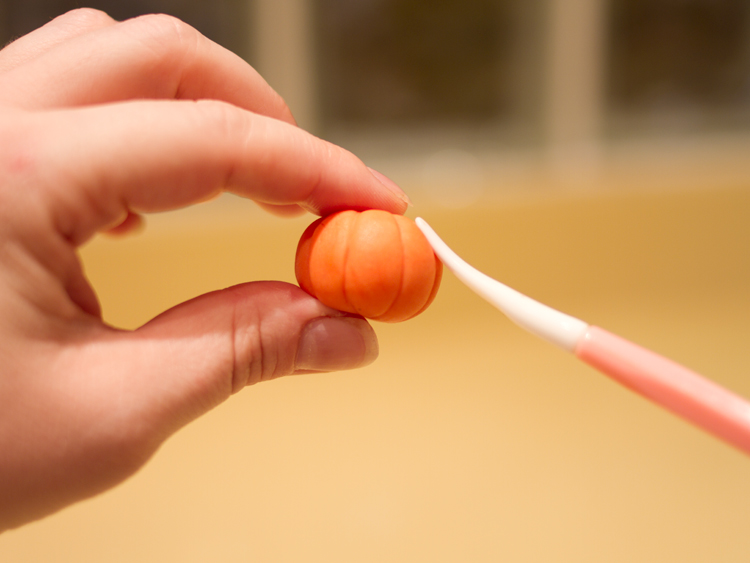
With our modeling tool we will mark the lines from top to bottom, and one at a time. If you don’t have this tool you can use the back of a knife, the rounded side that doesn’t cut.
With the small ball modeling tool we mark the top to make a small hole. If you do not have the ball tool, you can use a Q-tip covered with plastic wrap.
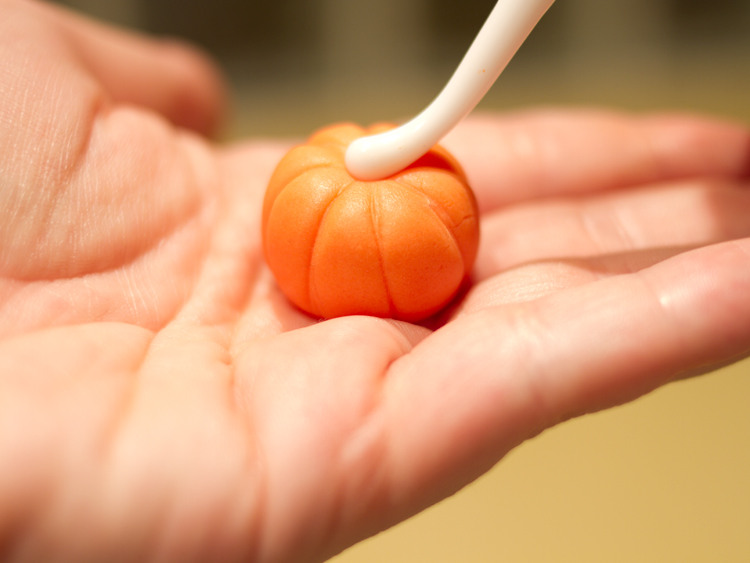
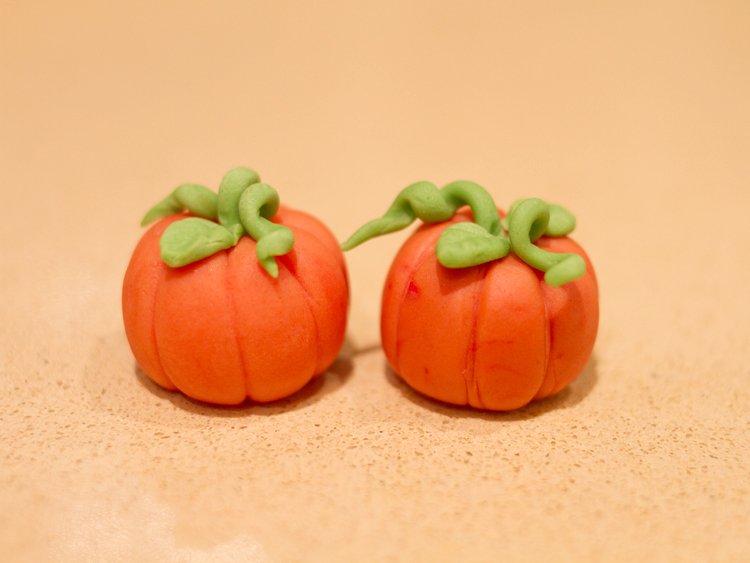
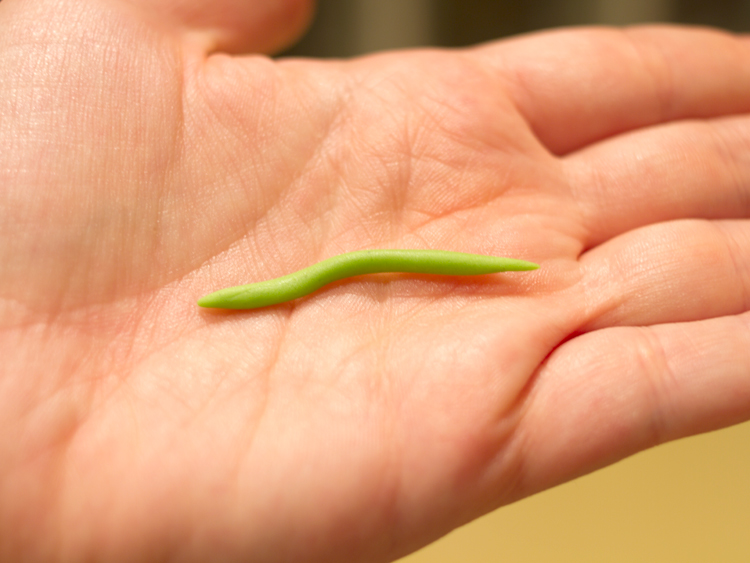
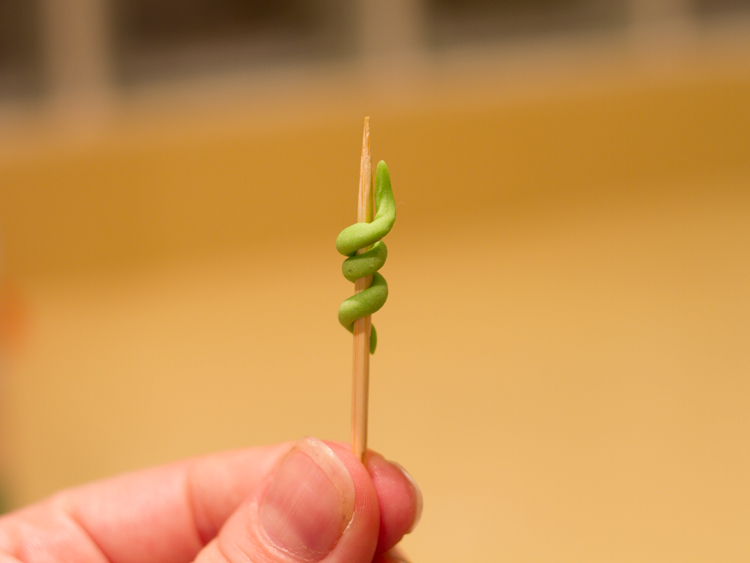
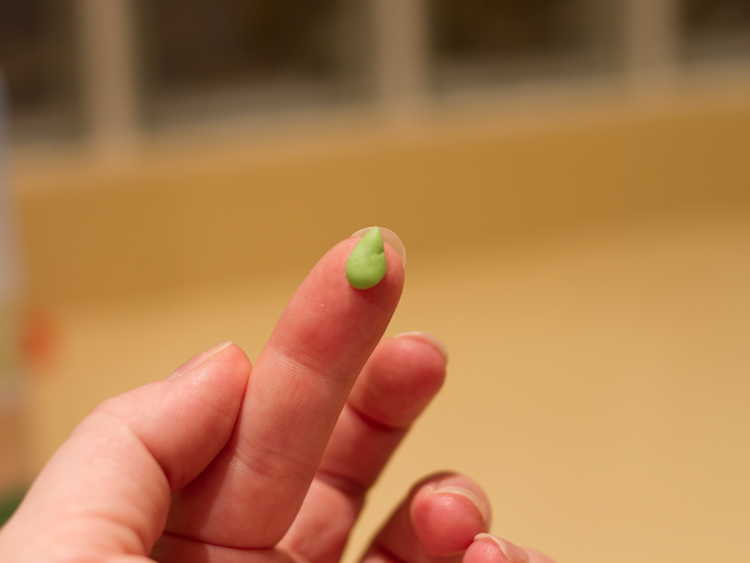
We take a small piece of green fondant and roll it until it is very thin, giving it the shape of a spaghetti noodle. We twist it around a toothpick to give it a swirly shape for the vine. We then fold it in half, and carefully paste it to the top of the pumpkin. To do this we will press it down on the center, where it comes in contact with the pumpkin.
You could leave it like this, and it would already look cute, but I also like to put some little leaves on it. For this we take two very small pieces of green fondant, and very carefully we shape it with our fingers. Later with our tool we mark the veins on the leaves. We apply a drop of water with a paintbrush behind the leaf, and paste it onto the pumpkin, one on each side of the vines.
As you can see the process is quite simple. Perhaps the most complicated part is handling the very small pieces of fondant, but with a little bit of patience, they turn out really well.
Here you have the result, which I think looks absolutely beautiful. This same process could be used with plasticine or modeling paste, or other materials and can be used for other applications. But for now, our cupcakes will look amazing, and with very little money, time and effort.
What do you think of these tiny pumpkins? Will you try to make them at home? If you finally do, you can upload a photo with your result to social networks and show them to me, but don’t forget to tag me @myberryown so I can see them! Have a great Halloween!